Category: Guides

Learn about eazyBackup through our documentation and start running backups!

Storage Vault Usage Report

Using the online Control Panel, it is possible to get a detailed report of data usage in your storage vault(s).

  1. Login to the eazyBackup Control Panel: https://panel.eazybackup.ca/
  2. Click on 'Storage Vaults' from the left side menu.
  3. You will see a list of your storage vaults on this page. Click the link in the 'Stored' size column to open the report.
  4. The report will display data that belongs to current backups, data held in retention by retention policies, and data from 'unknown' items. 'Unknown' items are Protected Items that have been deleted, but the data has not yet expired based on the retention policy set on your storage vault.
  5. Reports can be exported to the Clipboard as a CSV or Excel file.


Hyper-V Virtual Machine Backup Walkthrough

The Hyper-V Protected Item will help you perform backups of Hyper-V geust virtual machines on Windows Server.

The underlying technology is microsoft VSS and is compatible with all versions of Hyper-V running on Windows Server, including Windows Server 2022 (the latest version at the time of writing).

This backup type is only applicable when running on Windows Server. Hyper-V on Windows Desktop is not supported by this Protected Item type.

eazyBackup integrates with the Hyper-V VSS writer to perform a Hyper-V backup snapshot, including support for in-VM quiescence on supported guest operating systems.

Backing up a Hyper-V virtual machine with eazyBackup includes, but is not limited to:

  • its configuration file
  • all attached virtual drives
  • the contents of memory (if the machine was running)
  • the full tree of saved checkpoints

You can select individual virtual machines for backup, or choose “All virtual machines”.


Add New Protected Item:


Select Microsoft Hyper-V backup type and give the Protected Item a name:


Select VMs for backup by clicking the + button:


Select all Virtual Machines or individual VMs for backup:


The Item selection window shows you which VMs you have selected for backup - Click Next:


Create a new schedule, click the + button to create the schedule:


You can name the schedule:


Select the Time tab, click the + button to add scheduled run times:


Set your start time, then cllick OK and Next:


Default retention is 30 Backup Jobs, you can modify the retention settings here  to suite your requirements:


Click Finish to Save the Protected Item:


Kroll Pharmacy Management Database Backup

We reccomend performing a daily backup of the Kroll database. Start the backup after business hours to ensure all patient data is included in the daily backup.

We suggest that in addition to the Kroll data, you backup all of the files on your server with our File/ Folder Protected Item. You can also perform a Disk Image backup in the event that you require a bare metal disaster recovery solution.

At a minimum it is critical that you back up your Kroll database files from the default location C:/KrollWin/Backup folder.

To perform a cloud backup of the Kroll database, you will first need to perform a local backup of the Kroll database using the Kroll windows 10 application. The local database backup can then be backup up by eazyBackup to the cloud.

  • Open Kroll pharmacy software and log in as an administrative user.
  • Click on the File Menu > Configuration > Work Station > This Workstation.
  • In the Station Configuration window, click on the "Backup" tab
  • In the Backup Location, specify a local folder where a copy of the backup can be stored. Make sure you have sufficent free space on the destination drive. The database backups are typcially 40-60GB each and you should have free space to hold at least one weeks worth of local backups.
  • The default backup location is C:/KrollWin/Backup
  • The Kroll application will perform a daily backup to the Backup Location you specified.

Once you have Kroll configured to make a daily backup to the local device, you can configure eazybackup to perform a daily backup of your local files.

Step 2. Schedule eazyBackup to backup the Kroll database export

  • Open the eazybackup desktop application
  • Click Add Protected Item
  • Choose Proted Item type "Files and Folder"
  • Click the Custom tab
  • From the Custom file selection tab, choose the location where you scheduled the daily export of the Dentrix database.
  • Click Next in the Protected Item wizard until you reach the Schedule option. Create a new daily backup schedule for this Protected Item.
  • Remember that your Kroll database export must have completed before eazyBackup can start, allow enough time between when the Kroll application exports a copy of your database and when eazyBackup is scheduled to run.


At a minimum you should backup the following locations with the eazyBackup desktop application. After the backup has complted, we reccomend you preform a full restore so that you fully understand the process of backup and restoring in the event of an emergency.

C:/KrollWin/Backup

C:/KrollWin/Medis

C:/KrollWin/POS

C:/KrollWin/BuddyFill


How to Backup Patterson Eaglesoft Dental Software

We reccomend performing a daily backup of the Eaglesoft database. Start the backup after business hours to ensure all patient data is included in the daily backup.

We suggest that in addition to the Eaglesoft data folder, you backup all of the files on your server with our File / Folder Protected Item. You can also perform a Disk Image backup in the event that you require a bare metal disaster recovery solution. At a minimum it is critical that you back up your Eaglesoft database files from the default location of C:\Eaglesoft\Data\.

The default Data folder paths are:

  • C:\Eaglesoft\Data\Audio
  • C:\Eaglesoft\Data\Images
  • C:\Eaglesoft\Data\Metafile
  • C:\Eaglesoft\Data\Customdraw types
  • C:\Eaglesoft\Data\Documents
  • C:\Eaglesoft\Data\Indicators
  • C:\Eaglesoft\Data\Data2*

Step 1. Make sure that everyone in the office is logged out of the application to ensure the backup process has exclusive access.

Step 2. Schedule the Patterson server engine to stop before the backup is scheduled to start.

  • Use windows Task Scheduler to Start and Stop the Server Engine - See this article for detailed instructions: https://pattersonsupport.custhelp.com/euf/assets/Answers/4868/DB_Automated_Stop_Start_07.26.17.pdf?nointercept/1
  • Open the eazybackup desktop application
  • Click Add Protected Item
  • Choose Proted Item type File / Folder Backup
  • Click the Custom tab
  • From the Custom file selection tab, choose the data location (default is C:\Eaglesoft\Data\)
  • Click Next in the Protected Item wizard until you reach the Schedule option. Create a new daily backup schedule for this Protected Item.
  • Use windows Task Schedulerto start the Patterson Server Engine after the daily backup is complete.

IMPORTANT - You must schedule the shutdown of the Patterson Server Engine before eazyBackup can start, or important files may be missed in your backup. 

After you have completed a successfull backup, perform a restore of the server database. It's important to go through the process of resroting data to familiarize yourself with the process.


How to Backup Dentrix Database to the Cloud

We reccomend performing a daily backup of the Dentrix database. Start the backup after business hours to ensure all patient data is included in the daily backup.

We suggest that in addition to the Dentrix common folder, you backup all of the files on your server with our File/ Folder Protected Item. You can also perform a Disk Image backup in the event that you require a bare metal disaster recovery solution. At a minimum it is critical that you back up your Dentrix database files from the Common folder.

Step 1. Schedule a daily database export from Dentrix:

Export a copy of your live database either manually or automatically. For this step you will need to use the Dentrix Server Administration Utility. In order to back up the active Dentrix database files, the database must be exported to a location where the eazyBackup desktop application can back up a copy of your database.

  • Open this Dentrix Server Administration Utility. This is usually located at C:\Program Files\Dentrix\_ServerAdmin.exe.
  • Click the Export/Restore Database tab
  • Under Scheduled Database Exports, select Enable Scheduled Exports.
  • Configure your scheduled export time
  • Click Update Scheduled Status to save the export schedule.

Step 2. Schedule eazyBackup to backup the Dentrix database export

  • Open the eazybackup desktop application
  • Click Add Protected Item
  • Choose Proted Item type File / Folder Backup
  • Click the Custom tab
  • From the Custom file selection tab, choose the location where you scheduled the daily export of the Dentrix database.
  • Click Next in the Protected Item wizard until you reach the Schedule option. Create a new daily backup schedule for this Protected Item.
  • Remember that your Dentrix database export must have completed before eazyBackup can start, allow enough time between when the Dentrix Server Administration Utility exports a copy of your database and when eazyBackup is scheduled to run.

eazyBackup Control Panel

The control panel will allow you to remotely manage devices that are online and connected to the service. The control panel will allow you to do most things you can do in the desktop application.

  • At the login screen enter your backup account Username and Password.
    • The control panel does not accept an account email address, you must enter a backup account Username.
  • If you are an MSP with multiple backup accounts, login to each acocunt you want to manage one at a time.

You can find your backup account username within the
client area from Backup Accounts -> Manage Accounts.


Control Panel for eazyBackup Accounts: https://panel.eazybackup.ca/

Control Panel for OBC Accounts: https://panel.obcbackup.com/

Control Panel Features

  • Create and manage Protected items
  • Configure 2FA
  • Start and Stop Backup Jobs
  • Restore Items (Your can restore to the original device if connected, you cannot download the restore in the browser)
  • Add / remove storage vaults and manage vault retention policies
  • View and export  job logs from the 'Histroy' page.
  • Cancel running jobs from the 'History' page

Control Panel Demo

Disk Image Backup Walkthrough

This is a walkthrough to help you create Disk Image backup.

  • Disk Image backups will deduplicate with other data existing inside your Storage Vault. For example, backing up Files and Folders and performing a Disk Image backup from the same hard drive will deduplicate, and provide you with a valuable storage savings.
  • If you are looking for technical information on the Disk Image backup type, please see this article - Disk Image Backup

Add a new Protected Item, select the Disk Image backup type

Disk Image Protected Item
Note: You need to have purchased a backup plan that includes the Disk Image feature in order to create a Disk Image Protected Item.

Select the disk that will be included in the backup

Disk Image Protected Item Partition Selection

After creating a Disk Image backup, if any changes are made to the partition table of that disk, that disk to be recognized differently. You will receive a warning that the drive can no longer be found and you will need to reselect the drive and/or partitions.

Include unused disk sectors for forensic data recovery​

By default unused space from the disk will be excluded from the backup, enabling this option will include any non-indexed and marked-as-deleted files in the free space. This could be used for forensic data recovery, but keep in mind that it will lengthen the backup time.

Microsoft Office 365 Cloud to Cloud Backup for MSP

Use eazyBackup as a MSP to offer a "cloud to cloud" Office 365 backup service to your end customers.

Setup steps:

  • Create a VM on Azure and install eazyBackup on your Azure VM
  • Create a Protected Item for each target Office 365 tenant organization.

Each "cloud to cloud" Office 365 organization that you want to back up would be represented as a Protected Item, not as a separate backup account. This allows you to easily centrally manage the O365 backups form the control panel, creating/managing backups and schedules.

You can monitor the worker VM's CPU and memory resources, and increase the instance's resources as necessary; or you can split into multiple worker VMs.

eazyBackup supports sending job report emails to different recipients for different Protected Items.

Restoring Office 365 Items

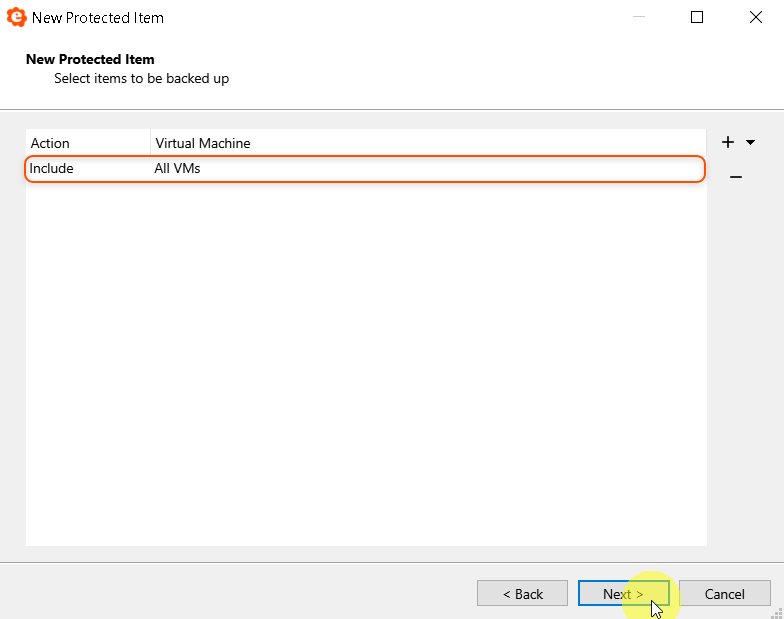
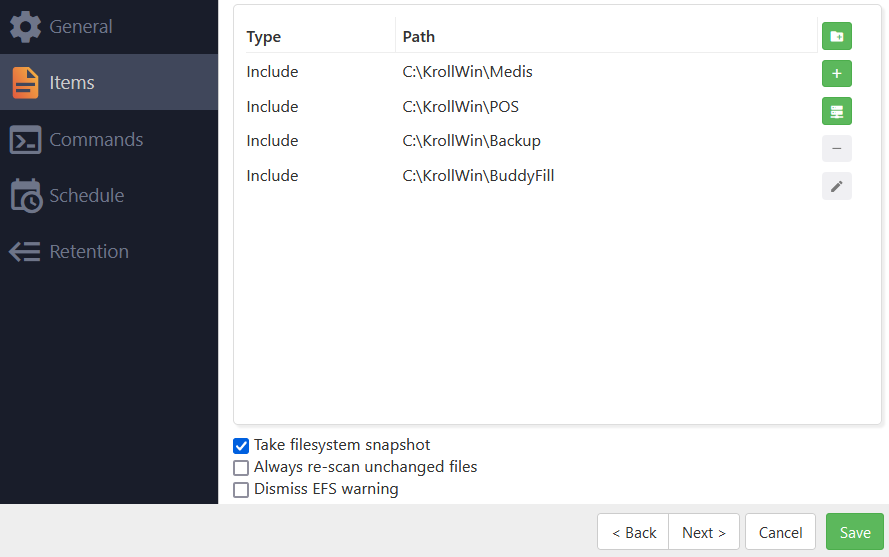
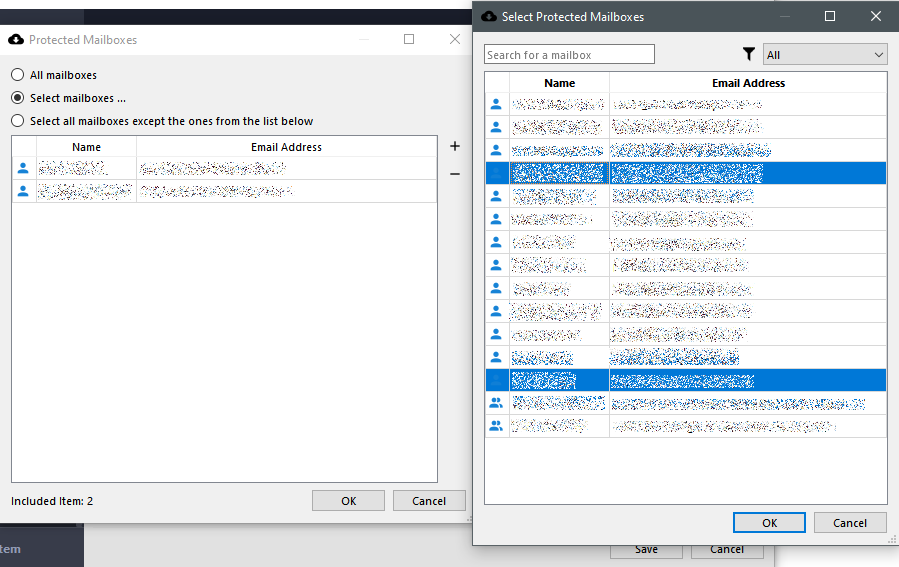
Select files for restore. When browsing files to restore, different columns are displayed depending on the type of item being browsed.

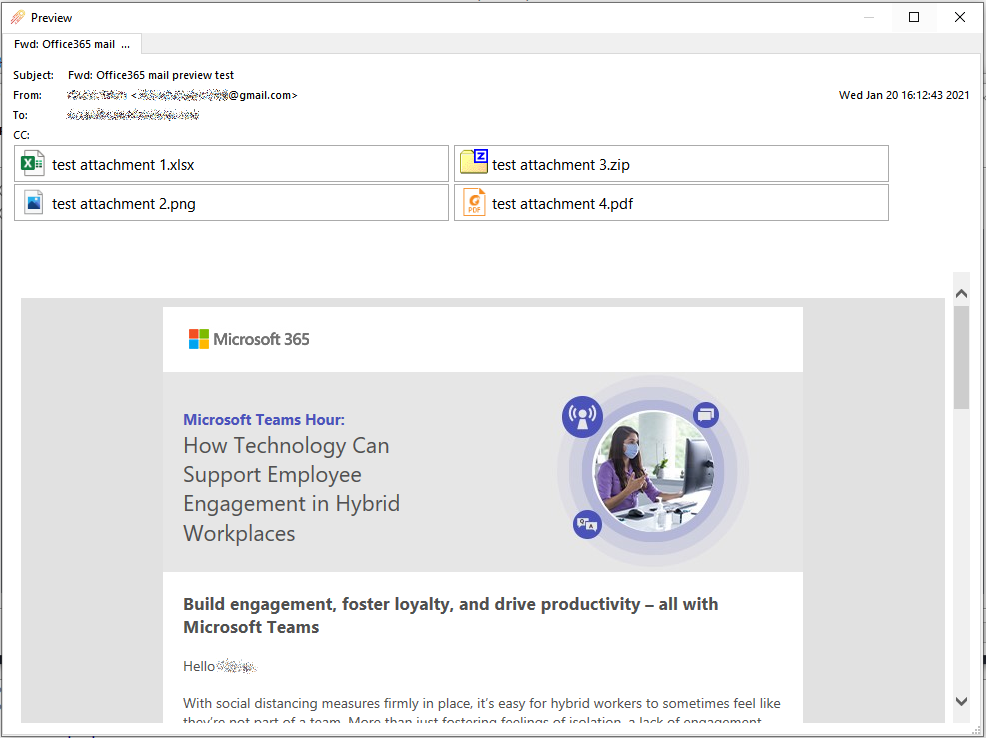
Preview an email before restoring it, by using the right-click menu. The email preview shows the rich HTML content if the email contains it. Email preview contains the header fields, such as the From, To, and Subject fields; information about attached files; and embedded images.

Restoring Office 365 items to the local PC

Emails are restored in MIME format (*.eml). These files can be opened with Microsoft Outlook on your PC, or in any other email program (MUA) such as Mozilla Thunderbird. Microsoft Outlook supports importing *.eml files in bulk by dragging-and-dropping into an Outlook folder.

If the email represents a meeting invite, the email contains a calendar appointment attachment in vCalendar format. These attachments can be renamed to *.vcf and opened with Microsoft Outlook on your PC.

Contacts and Calendars are restored in JSON format. These files require further processing to convert to standard vCalendar format (*.vcf) before opening with Microsoft Outlook.

SharePoint file attachments, including OneDrive items and Teams files, are found within associated SharePoint site. OneDrive files can be restored as regular files and folders underneath the "Documents" subdirectory of the associated SharePoint site.

Restoring Office 365 items back to the cloud

You can choose to restore Office 365 items back to the cloud. You can choose to restore either to the original Office 365 cloud location, or a custom location.

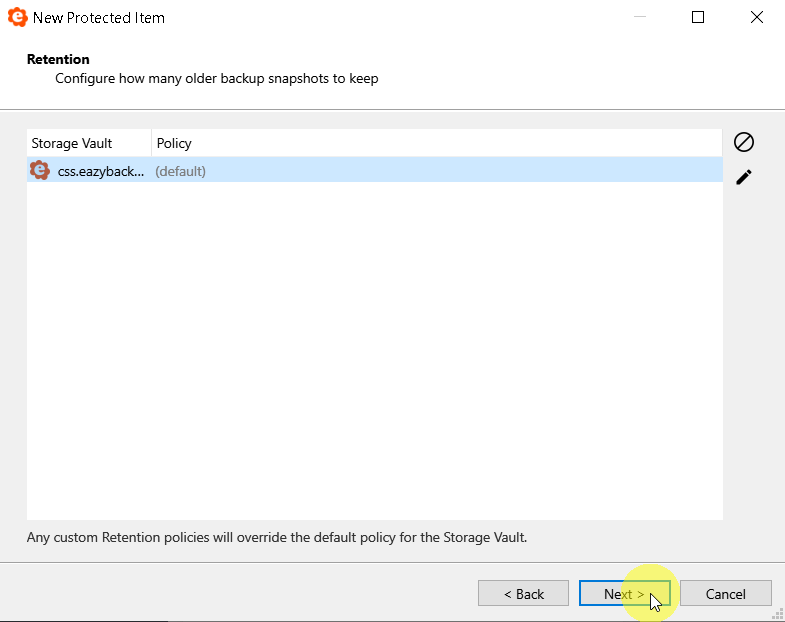
All items will be restored with the default retention policy.

Any existing emails will not be overwritten. If an email selected for restore already exists in the target Office 365 cloud location, it will be restored as a duplicate email.

Microsoft Office 365 Backup Guide

The "Microsoft Office 365" Protected Item type allows you to back up data from your Office 365 cloud account. The backup job runs on a local device, using eazyBackup's client-side encryption, compression and deduplication to store data efficiently.

The following Office 365 services are supported:

  • Exchange Online
    • Mailbox (Email)
    • Calendar
    • Contacts
  • Sites
    • SharePoint
    • OneDrive for Business
    • Teams Files

NOTE: Microsoft Online Services are responsible for the availability of the Office 365 online service and meeting their SLA guarantees. There are first-party archival and history solutions such as Retention Policy and Litigation Hold. Back up your Office 365 cloud account, for purposes of data safety; redundancy; resilience to tampering, misconfiguration, and accidental loss; legal compliance; unified reporting with other backup sources; and ease of restoring single items.

Office 365 services

Services Backup Restore to Local Restore to Cloud Supported Not Supported
Exchange Online
Mailbox (Email) Yes Yes Yes Active users, shared mailboxes Guest users, Deleted users, Discovery mailbox, Archive mailbox, Journal mailbox, Outlook group mailboxes
Calendar Yes Yes Yes Restore to local:JSON format
Contacts Yes Yes Yes Restore to local:JSON format
Tasks No No No
SharePoint Online
Sites Yes Yes No Restore lists, documents and pages individually
Lists Yes Yes Yes
Pages Yes Yes No
OneDrive for Business
Document Library (Word, Excel, PowerPoint, OneNote) Yes Yes Yes Displayed under "Documents" in associated SharePoint site
Teams
Files Yes Yes Yes Displayed under "Documents" in associated SharePoint site
Chat No No No
Calendar No No No
Meetings No No No
Call No No No

Authentication

For backups, grant eazyBackup the ability to read data from your Office 365 account. Please pay attention to the credentials provided as a significant amount of access to the Office 365 organization occurs. This grant is done by creating an "Application" inside Azure AD. This application can be created automatically or manually.

Automatic application registration

Click the "Azure Active Directory" button. This opens a registration application wizard dialog that steps you through the process to automatically register. Authenticate with Azure as a top-level

Manual application registration

If you are unable to use the automatic application registration, you can register the application manually via the Azure AD web interface via the following steps:

  1. Register a branded application inside the Azure Active Directory panel:

    • Click "App registrations" > "New registration"
    • Enter an application name (e.g. "eazyBackup"). The other options can be left as default
    • Click the "Register" button.
    • Copy the Application (client) ID field into eazyBackup's Application ID field
    • Copy the Directory (tenant) ID field into eazyBackup's Tenant ID field
      • Ensure that there are no extra spaces in the field after the Tenant ID
  • Register an authentication secret for the application:

    • Click the "Certificates & secrets" left-hand tab
    • In the "Client secrets" section, click the "New client secret" button
    • Create a new secret
      • Specify any name (e.g. "eazyBackup credentials") and any expiry (e.g. "Forever / No expiry")
    • Copy the Value column into eazyBackup's Application Secret field
  • Grant this application permission to read Office 365 data:
    • Click the "API permissions" left-hand tab
    • Click the "Add a permission" button

Find and add the following permissions:

  • "APIs my organization uses" > "Office 365 Exchange Online" > Application permissions > ...
    • "Other permissions" > full_access_as_app
  • "Microsoft APIs" > "Microsoft Graph" > Application permissions > ...
    • Application.Read.All
    • Calendars.Read
    • ChannelMessage.Read.All
    • Contacts.Read
    • Directory.Read.All
    • Files.Read.All
    • Files.ReadWrite.All
    • Group.Read.All
    • GroupMember.Read.All
    • Mail.Read
    • Notes.Read.All
    • Reports.Read.All
    • Sites.FullControl.All
    • Sites.Manage.All
    • Sites.Read.All
    • Sites.ReadWrite.All
    • TeamMember.Read.All
    • TeamMember.ReadWrite.All
    • User.Read.All

    • Back on the API permissions page, click the top "Grant admin consent for (My Organization Name)" button

The authentication details are automatically populated in the desktop app, use the "Test Connection" button to validate the Office 365 credentials.

Configuring selections

eazyBackup supports backing up different items from your Office 365 account. Use the pencil button in the desktop app to configure which mailboxes and sites will be backed up. Make separate selections for both mailboxes and sites using the dropdown arrow beside the plus button.

User has the following options for backups:

  • Back up all mailboxes/sites
  • Back up only the selected mailboxes/sites
  • Back up all mailboxes/sites except for the selected ones

When selecting users or sites for backup, the first dialog shows your current selection. Inside the first dialog, click the plus button to open a second dialog, to find users and sites from the Office 365 server.

The Search field in the second dialog box can be used to quickly filter for a known user or site.

When selecting users, the dialog also shows groups (Azure AD groups of user accounts). If you select a group, eazyBackup will backup all the mailboxes for user accounts belonging to this group.

eazyBackup supports Azure AD groups of user accounts, but does not currently support Outlook groups. If email messages are in an Outlook group, eazyBackup will not be able to to back them up. You can see the Outlook groups via the Sites view, but group messages are not included via the Sites backup job.

The only mailboxes available for selection are:

  • Active Users (as shown in the Office 365 Admin Center), and
  • Shared Mailboxes (created with an Exchange E5 license plan or higher).
    • eazyBackup supports backing up Shared Mailboxes. Shared Mailboxes are counted as a full separate mailbox for the purposes of billing, regardless of the number of other accounts with access to the Shared Mailboxes.

The Protected Item configuration is also available remotely via the control panel web interface. Remote configuration from the panel can be used when the device is online with a live-connection to the service.


en_USEN