Category: Troubleshooting

OneDrive The cloud operation is not supported on a read-only volume

To save on disk space, OneDrive (and some other cloud storage providers) use a system where some files are only "virtually" stored on the local disk, and are materialized from the cloud storage on-demand.

If you encounter the "Warning for OneDrive - The cloud operation is not supported on a read-only volume." error message, this means that file in question does not exist on the local PC, and the OneDrive virtual filesystem driver is refusing to download this file on-demand for eazyBackup to read it.

At the time of writing, the only available workaround is to disable the "Files-On-Demand" feature in OneDrive. However, this may cause an unacceptable increase in local disk usage for some customers.

To disable the "Files-On-Demand" feature in OneDrive:

  1. Right-click OneDrive in the System Tray
  2. Click the menu icon -> Settings -> Sync and backup -> "Files-On-Demand" section -> Click "Download all files", Click Continue
OneDrive The cloud operation is not supported on a read-only volume

Application failed to start because no Qt platform plugin could be initialized

When opening the eazyBackup application, you might see an error message similar to:

This application failed to start because no Qt platform plugin could be initialized.

This error typically occurs when the Qt platform plugin, which is required for the application to run, is missing or corrupted. The Qt platform plugin is bundled with eazyBackup, it is not a component of the Operating System. The Qt plugin provides access to the applications underlying graphical user interface (GUI) functionality, such as rendering windows, buttons, and other graphical elements.

  1. In most cases, the error will be caused by a corrupted installation of the eazyBackup software. Try uninstalling and reinstalling the application. Download the latest version of the application here: https://eazybackup.com/download/
  2. Errors related to the Qt platform plugin could be caused by file system corruption. If you are receiving errors related to the Qt platform plugin, it would be a good idea to check and repair any damaged System Files:
    1. Type cmd in the search box, and then right-click Command Prompt and select 'Run as administrator'.
    2. Type the following command in the elevated command prompt and hit Enter:
      sfc /scannow

      The SFC tool will scan and try to repair the corrupted system files automatically.

  3. If the SFC failed to repair any corrupt system files, you can also run the following DISM commands from the elevated command prompt:
    DISM /Online /Cleanup-Image /CheckHealth
    DISM /Online /Cleanup-Image /ScanHealth
    DISM /Online /Cleanup-Image /RestoreHealth

    The "/Online" parameter specifies that the command will be applied to the currently running operating system, as opposed to a mounted offline image.

    The "/Cleanup-Image" parameter specifies that the command will perform a cleanup of the system image. This cleanup can remove files that are no longer needed, reduce the size of the component store, and make it easier to maintain the system.

    The "/CheckHealth" parameter instructs DISM to check the health of the system image and report any issues it finds. This can be useful for diagnosing problems with the operating system or identifying corrupt or missing files.

    The "/ScanHealth" parameter instructs DISM to scan the system image for component store corruption and other issues, but without repairing them. The scan only reports the issues found, without attempting to fix them.

    The "/RestoreHealth" parameter instructs DISM to repair the system image by restoring any missing or corrupted files from a known good source. This may require an internet connection to download replacement files.

Multiple connections to a server or shared resource error

Error: Multiple connections to a server or shared resource by the same user, using more than one user name, are not allowed. Disconnect all previous connections to the server or shared resource and try again.

Lstat: CreateFile \\UNC\Server\Path\: Access is denied.

This error will typically occur when you have multiple Ptotected Items and each Protected Item is configured to backup a different network path, each with different network credentials.

This error message indicates that there is already an active connection to the network resource using a different username from the same computer.

Windows doesn't allow multiple connections to the same shared resource using different credentials .

Solution:

By using the same Username for all connections to a UNC path from the eazyBackup application you shouldn't run into this error.

This way you will not be trying to open a new connection to the same NAS using different credentials

Create one Username / Password on your NAS for all shared resources:

\\UNC\NAS1\Myfiles\

\\UNC\NAS1\Documents\

\\UNC\NAS1\Shared\

How to easily find disks with read / write errors in Windows

If you suspect a hard drive in your computer may be failing with disk read/write errors, these errors are usually logged in the Windows Event Viewer. Here the common Event IDs we see related to failing disks:
Event ID 7: indicates that the disk has a bad block.
Event ID 11: driver detected a controller error on the device, which could be caused by a faulty cable, a failing drive, or a problem with the controller.
Event ID 51: disk is experiencing a paging operation or a certain disk operation, which failed. This can be caused by a faulty driver or a failing drive.

PowerShell

To speed up the process of locating disks with bad blocks or other issues, you can use PowerShell to quickly filter all events, displaying only the ones we want.
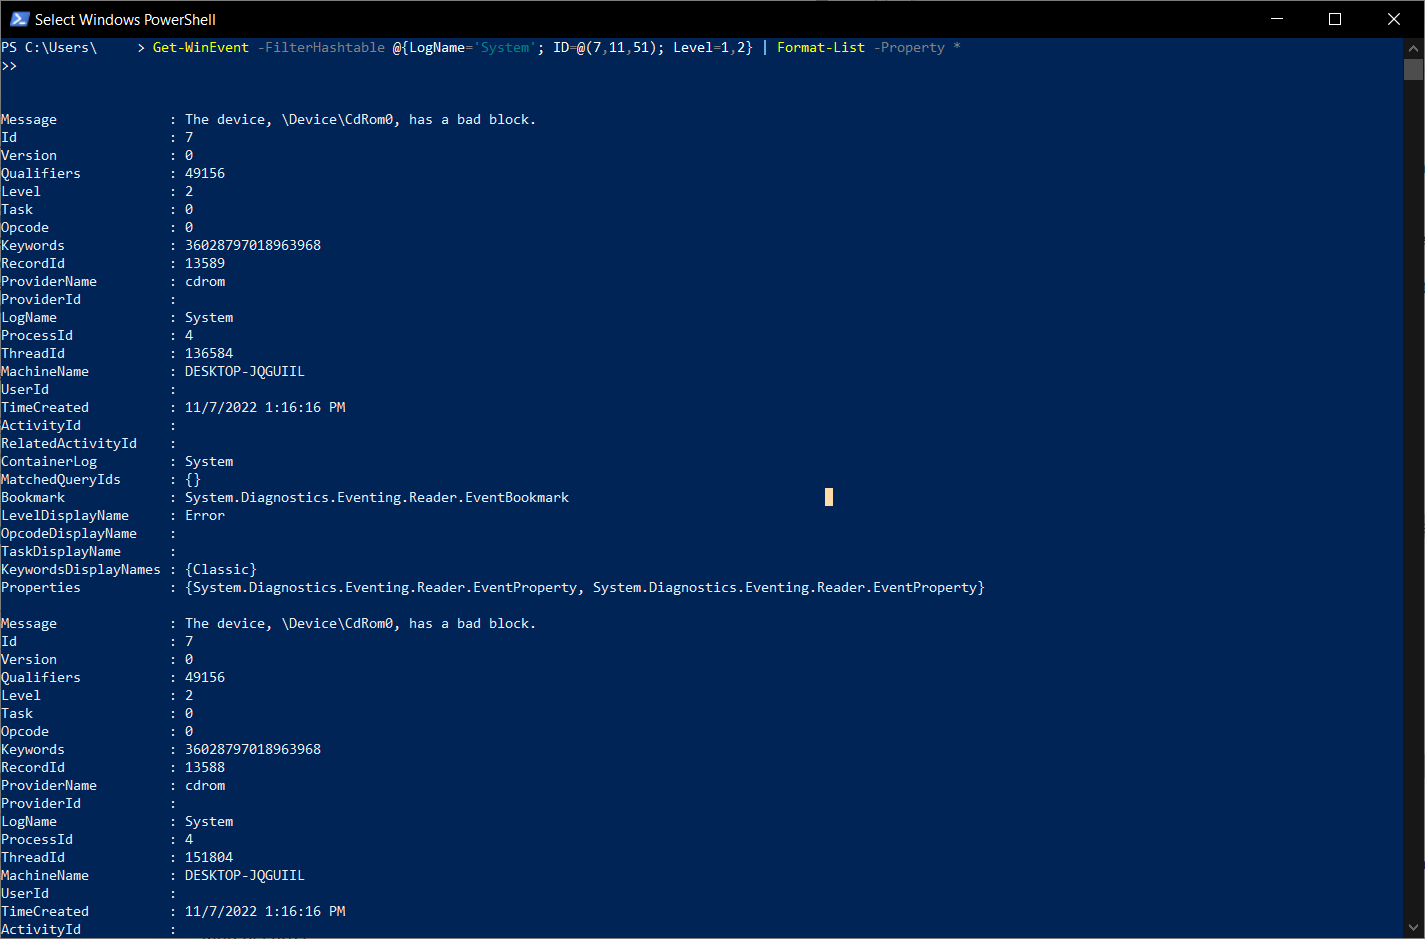
We can use the Get-WinEvent cmdlet to dump all the Event Viewer events with ID 7, 11, and 51 that are level 2 or higher (error and critical)
  • Open PowerShell and run the command: Get-WinEvent -FilterHashtable @{LogName='System'; ID=@(7,11,51); Level=1,2} | Format-List -Property *
If there are any events with the ID 7, 11, 51 of level 2 or higher they will be printed on the screen.

Performance Monitor

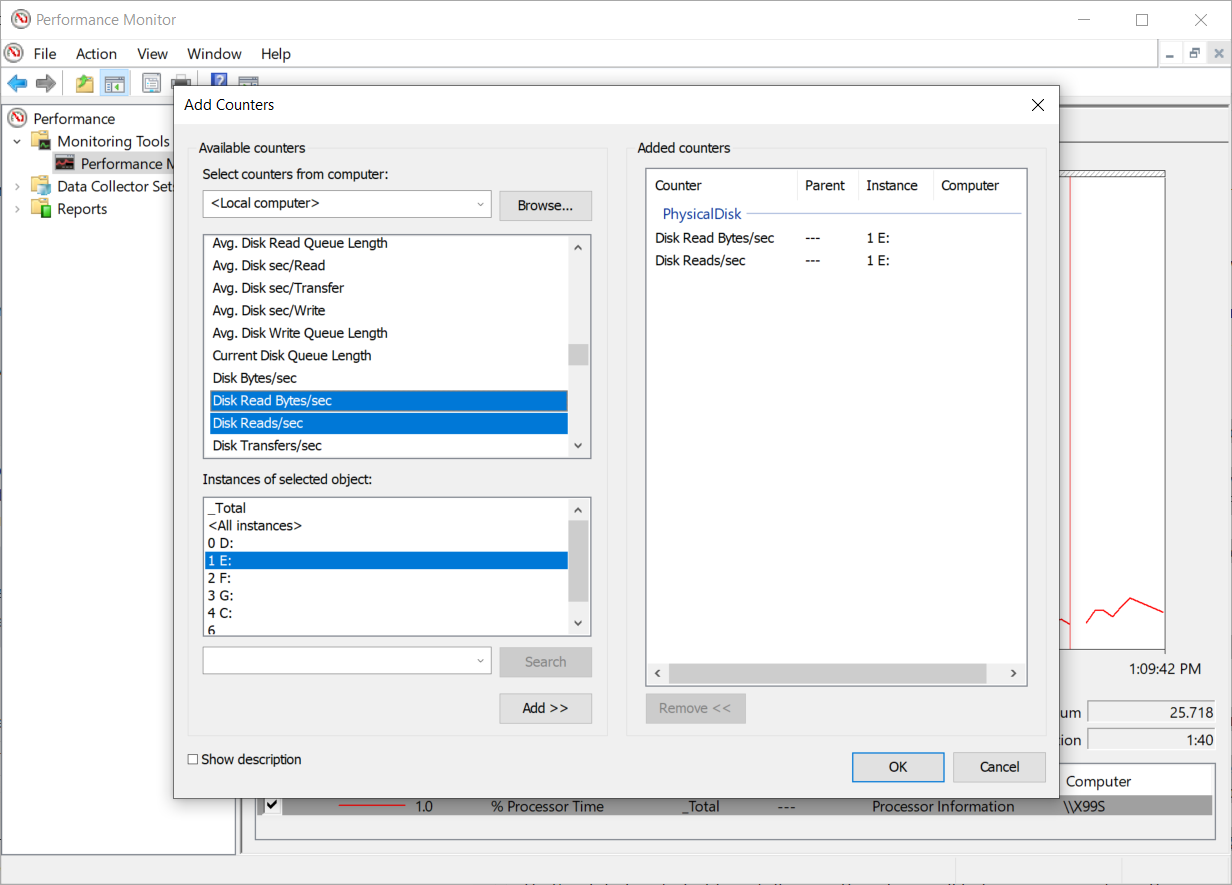
Another common method of identifiing disk read errors in Windows is to use the Performance Montor.
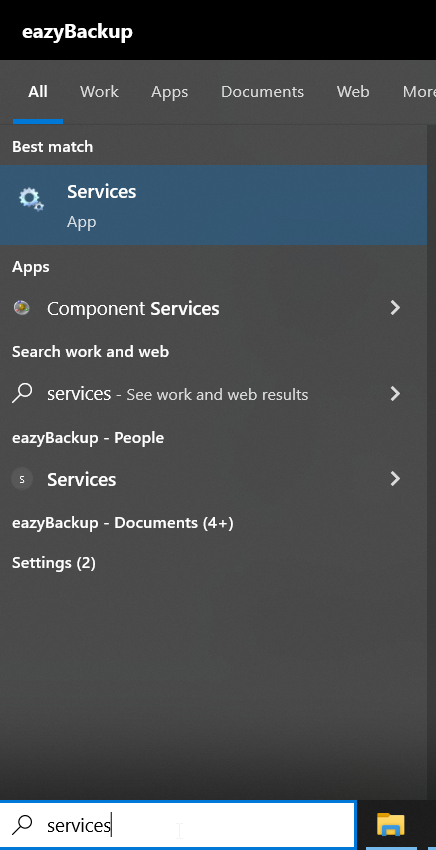
  • Open Performance Monitor by typing "perfmon" in the Start menu search bar, and then click on "Performance Monitor" in the search results.
  • Click on the "+" button to add a new counter, select the "PhysicalDisk" performance object, choose the disk you want to monitor, and select the "Disk Read Bytes/sec" and "Disk Reads/sec" counters.
  • Run a backup and watch the counters, If either of these counters show consistently high values, it could indicate disk read errors.

ChkDsk

You can use the chkdsk command with the /r option to check for disk errors during boot time. The /r option tells chkdsk to locate bad sectors and recover readable information, which can help fix disk errors. Run ChkDsk at your own risk.

How to run a boot-time chkdsk command:

  1. Open the Command Prompt as an administrator by right-clicking on the Start menu and selecting "Command Prompt (Admin)".
  2. In the Command Prompt window, type the following command and press Enter:
    chkdsk C: /r
    Note: Replace "C:" with the drive letter of the disk you want to check.
  3. You will be prompted to schedule the check for the next time you restart your computer. Type "Y" and press Enter.
  4. Restart your computer to initiate the boot-time chkdsk scan. The scan will run before Windows starts up.

During the scan, chkdsk will check for disk errors and attempt to repair any that it finds. The scan may take a while to complete, depending on the size and health of the disk.

Once the scan is complete, Windows will start up as normal. You can check the Event Viewer or the chkdsk log file to see if any disk errors were detected and fixed.

You use the Get-WinEvent cmdlet in PowerShell to quicky check for any disk errors that were detected and fixed during the chkdsk scan.
Command:Get-WinEvent -FilterHashtable @{LogName='Application', 'System'; ID=26214,26215,26228,26229,1001,1002} -MaxEvents 10 | Format-List -Property *
This will retrieve the 10 most recent events from both the Application and System logs with the specified event IDs. The example event IDs used in this command are what we normally see for disk errors generated during a chkdsk scan. It may not be a complete list.

Third-Party Disk Diagnostic Tools

There are some third-party disk diagnostic tools available that can check for disk read errors, such as CrystalDiskInfo, HD Tune, and SeaTools. One of these tools could be instaled an run to check for disk errors.

WARNING: Node (xxxx) filename.ext’ collision at position xxxx

WARNING: Node (xxxxx) filename.ext' collision at position xxxx

This warning indicates that eazyBackup encountered two files with the same name.

eazyBackup will back up the first copy it recevied with this file name.

The most common cause of this warning is that the customer is mounting a cloud storage location such as an S3 bucket or Azure Blob, as a network drive. Cloud storage locations can be mounted in windows with software like Cloudberry Drive or Tntdrive Drive.

A FUSE ("Filesystem in Userspace") (or similar) mounted drive over the network is going to perform significantly than a local disk as eazybackup has to 'stat' each file making many round trips to a location that is high latency, when compared to a local disk.


file truncated (expected xxxx bytes, got 0)

"Error for USERNAME filename.ext': file truncated (expected xxxx bytes, got 0)"

This issues usually occurs while backing up UNC paths from a NAS device such as a TureNAS, Synology, Qnap etc.

This error indicates that the backup application was expecting a file size of xxxx bytes for the file 'filename.ext', but it only found a file size of 0 bytes. This error could occur if the file is missing or if there was an interruption during the backup process that caused the file to be truncated.

To resolve this error, you should check if the original file exists and try to backup the file again. You may also need to check the backup settings and ensure that there are no network interruptions on your LAN during the backup process.

Reading subdirectories of – Open: /Files/Documents/ operation not permitted

This error message usually indicates that the backup software does not have the necessary permissions to access the folders listed in the error message.

eazyBackup runs as a background service in Windows. The background service runs as an the NT SERVICE\backup.delegate account. This account has very low permissions, and may not be able to access some files.

You can change the 'Log On' user of the eazyBackup delegate service to resolve this error:

  • Use the Taskbar search to search for 'Services' and then open the Services app.
  • Locate the eazyBackup delegate service. Right click and select Properties
  • Select the Log On tab.
  • Click the 'This account' option and click the Browse button
  • Click 'Advanced' and then 'Find Now'
  • A list of local accounts should appear, select an account that will have enough priveldges to access the files selected for backup. Usually your own account or an Admin acocunt will work well.
  • Click OK to close all open windows
  • You need to restart the service for the changes to tak effect. From the Services app, right click on the eazyBackup delegate service and select 'Restart'
  • Run your backup again to test if the change has resolved the warning.


Optimizing snapshot: not present in any index

Optimizing snapshot: not present in any index

To correct this warning, please complete a re-index and a retention pass of your storage vault:

-Open the eazyBackup desktop application
-Select the 'Settings' tab.
-Right click on the eazyBackup storage vault
-Select Advanced -> Rebuild Indexes

The index process can take anywhere from several minutes to hours depending on the size of the vault and the number of snapshots. When the index process is complete, run a retention pass on the storage vault.

-Open the eazyBackup desktop application
-Select the 'Settings' tab.
-Right click on the eazyBackup storage vault
-Select Advanced -> Apply retention rules now

When the task finishes, re-run your backup and confirm the warning message has been resolved. Please contact our support team if you need additional assistance.

Couldn’t load tree/xyz for subdirectory: tree/xyz not present in any index

Couldn't load <tree/xyz>; for subdirectory '': <tree/xyz> not present in any index

To correct this warning, please complete a re-index and a retention pass of your storage vault:

-Open the eazyBackup desktop application
-Select the 'Settings' tab.
-Right click on the eazyBackup storage vault
-Select Advanced -> Rebuild Indexes

The index process can take anywhere from several minutes to hours depending on the size of the vault and the number of snapshots. When the index process is complete, run a retention pass on the storage vault.

-Open the eazyBackup desktop application
-Select the 'Settings' tab.
-Right click on the eazyBackup storage vault
-Select Advanced -> Apply retention rules now

When the task finishes, re-run your backup and confirm the warning message has been resolved. Please contact our support team if you need additional assistance.

x509 Certificate has expired or is not yet valid

This problem is commonly caused by either a missing root certificate on the client computer or a firewall which is blocking the certificate.

The Windows OS may not be receving udpates to it's trusted root certificates. This issue is more common on older operating systems, Server 2012 R2 and older.

Updated root certificates may be missing on this device, and you will need to add the new root certificate to the device's trusted certificate store.

Reolution:

  • You can download a copy of the root certificate and install the certificate into the Local Machine certificate store.
  • eazyBackup uses Let's Encrypt for it's server certificates. You can find a copy of the root certificate here: https://letsencrypt.org/certificates/
  • Download and Install the root certificate to Local Machine in the "Trusted Root Certification Authorities" directory.


  • If your OS already has the root certificate, check your firewall and either add or allow access to the eazyBackup Let's Encrypt Certificate.


en_USEN